

Hello and welcome to the June Technique Squad Blog Hop! This month, the squad is featuring use of the Magic Slider Card Technique. I’ve had lots of fun learning and playing with this technique. There were several card making aficionados that I consulted to get ideas of how to do this as it was my first go. The two favorites I connected with were Mitosu Crafts and Lisa Curcio. You can see my video here!
One of the helpful tools in working on this technique is the use of the Stamparatus. It allows you to line up the layers of your card with the acetate sheet when the image is stamped with Stazon.


This was one of my first examples.
If you don't have the Stamparatus tool, don't let that stop you, one of my examples I tried with a Sharpie marker. It just takes a very steady hand. I did this because there wasn't a specific "outline" stamp that could be used with the bottles. So that leads me to one of my tips! When trying this technique, consider picking stamps that outline vs. stamps that shade.


This example was the one I did with the Sharpie!


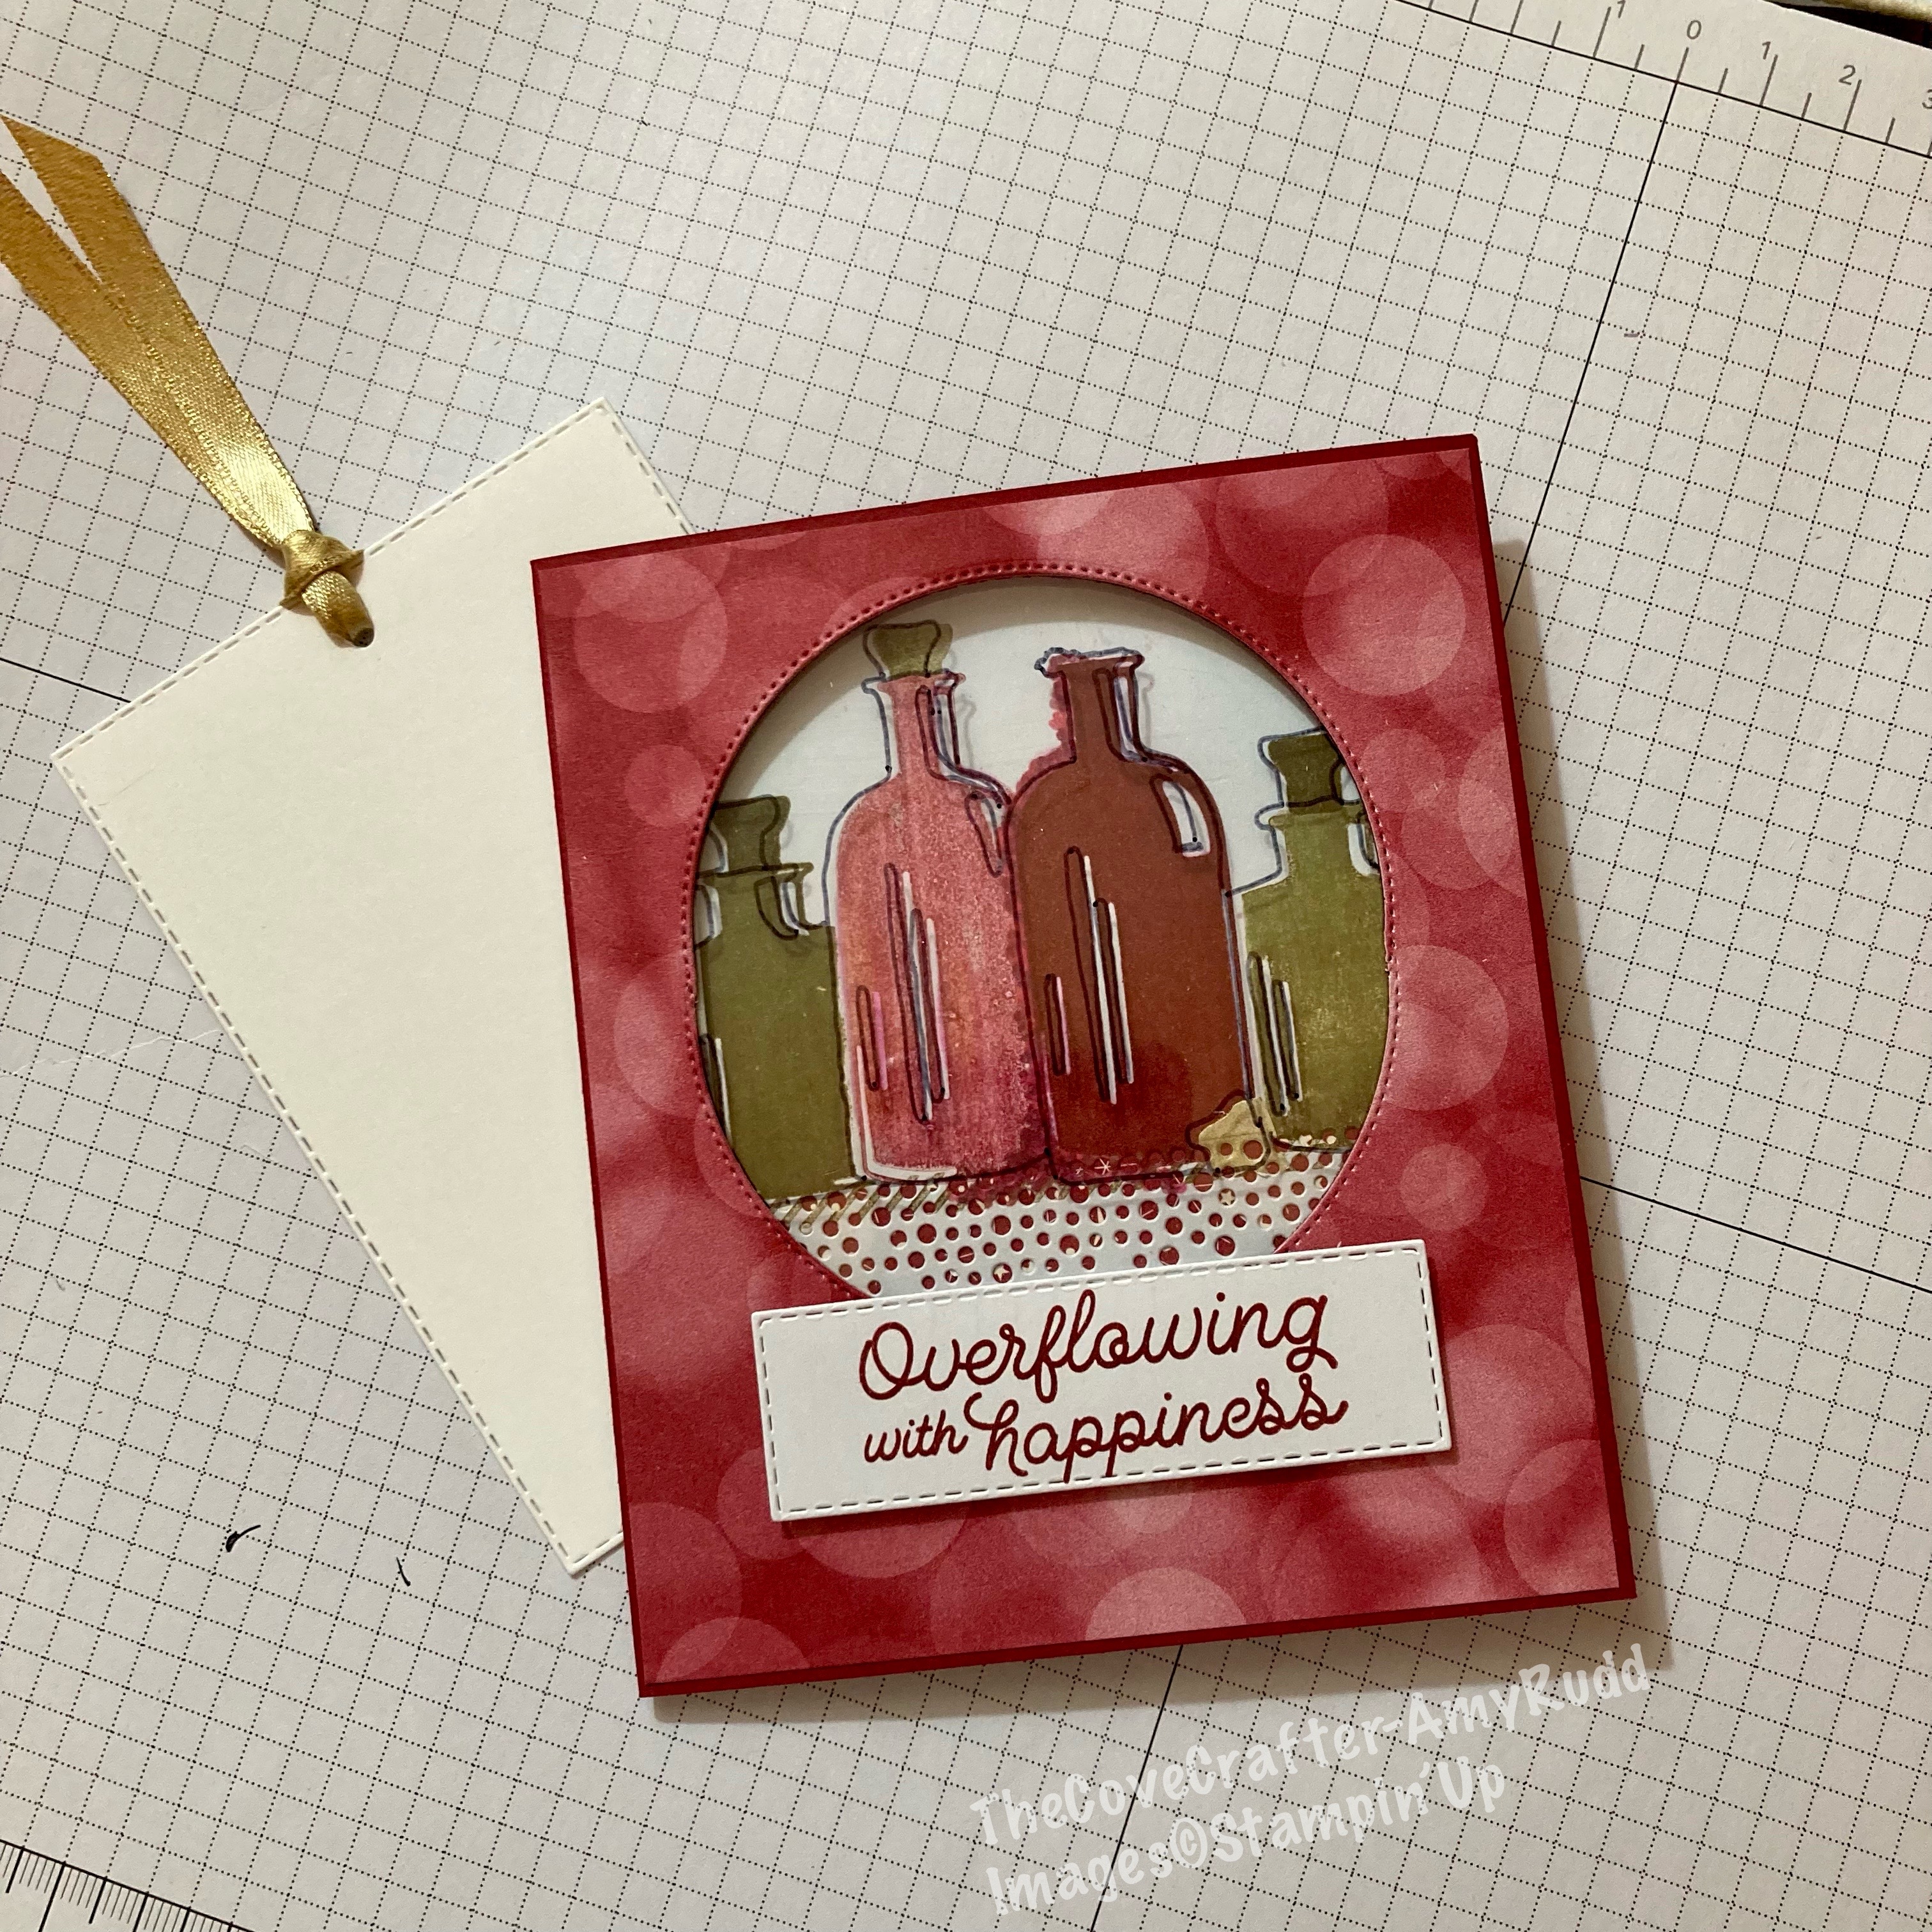
This one turned out to be my favorite. I am filled with happiness to know how to do this technique now.
- start with a based that is 5 inches by 11 inches
- cut a piece of basic white first which measures 4 and 1/8 by 4 and 7/8
- score at 3.5 inches and then measured over 4.25 inches and made the second score line so the front panel is 4.25 inches
- back panels aren't evenly sized but you could do that if you wish
- cut the back panels diagonally from the score line to 1/2 inch up from the bottom to make them like a stand
- stamp the image using the stamparatus tool if you have it using momento ink and color (I recommend waiting to add to the base in the event of a mistake! Make sure you're happy with the color before you begin the install of the acetate and the base.
- After coloring is done, line up same size piece of acetate and then stamp with Stazon. If available use the Stamparatus at this time again to make easy lining up of stamped image
- add piece of DSP to front of base (I used the in color DSP on the card shown above) same size as inside piece that is stamped and colored 4 and 1/8 by 4 and 7/8
- after mounting DSP, cut a window to show off the stamped and colored image (don't mount it yet). I used the stylish shapes largest square but you could use any and if you don't have dies to cut it out, you could also cut a window into the base and DSP piece using the trimmer. (sized about 3.5 x 3.5
- Cut an insert that's 3.5 by 4.5 (approximately) for this i used the 4th from largest stitched rectangle die to cut it, I also used a mini-hole punch and punched a hole big enough to insert a ribbon.
- Last, create a channel by laying the insert between the colored image and the acetate (make a sandwich-lol base, image, insert, acetate) add dimensional foam strips on 3 sides around the insert between the image layer and the acetate layer-pull the backing off one side at a time and adjust as needed.
- Make sure the image is showing through the window properly before sticking it down. I also added tear and tape strips around the outside of the channel created with the foam strips. Then I stuck it down to the base, one side at a time and adjusted as I slowly uncovered the pieces of tear and tape.


- base color
- matching DSP
- basic white paper
- matching ink colors, blends or stampin write markers
- momento black ink
- stazon black ink
- acetate
- dies to cut window, insert
- tear and tape
- foam strips
- stamp set of your choice
- dies or punch as needed
- stamparatus
- stamp cleaner
- ribbon
- embellishments as desired
- mini-hole punch
- scissors
- tape runner
Hope you enjoyed our blog hop. Now, click the "next" button to move on to our next stop on this hop.


Wow! So many cards, I love them
ReplyDelete